Custom Button Labels for Forms
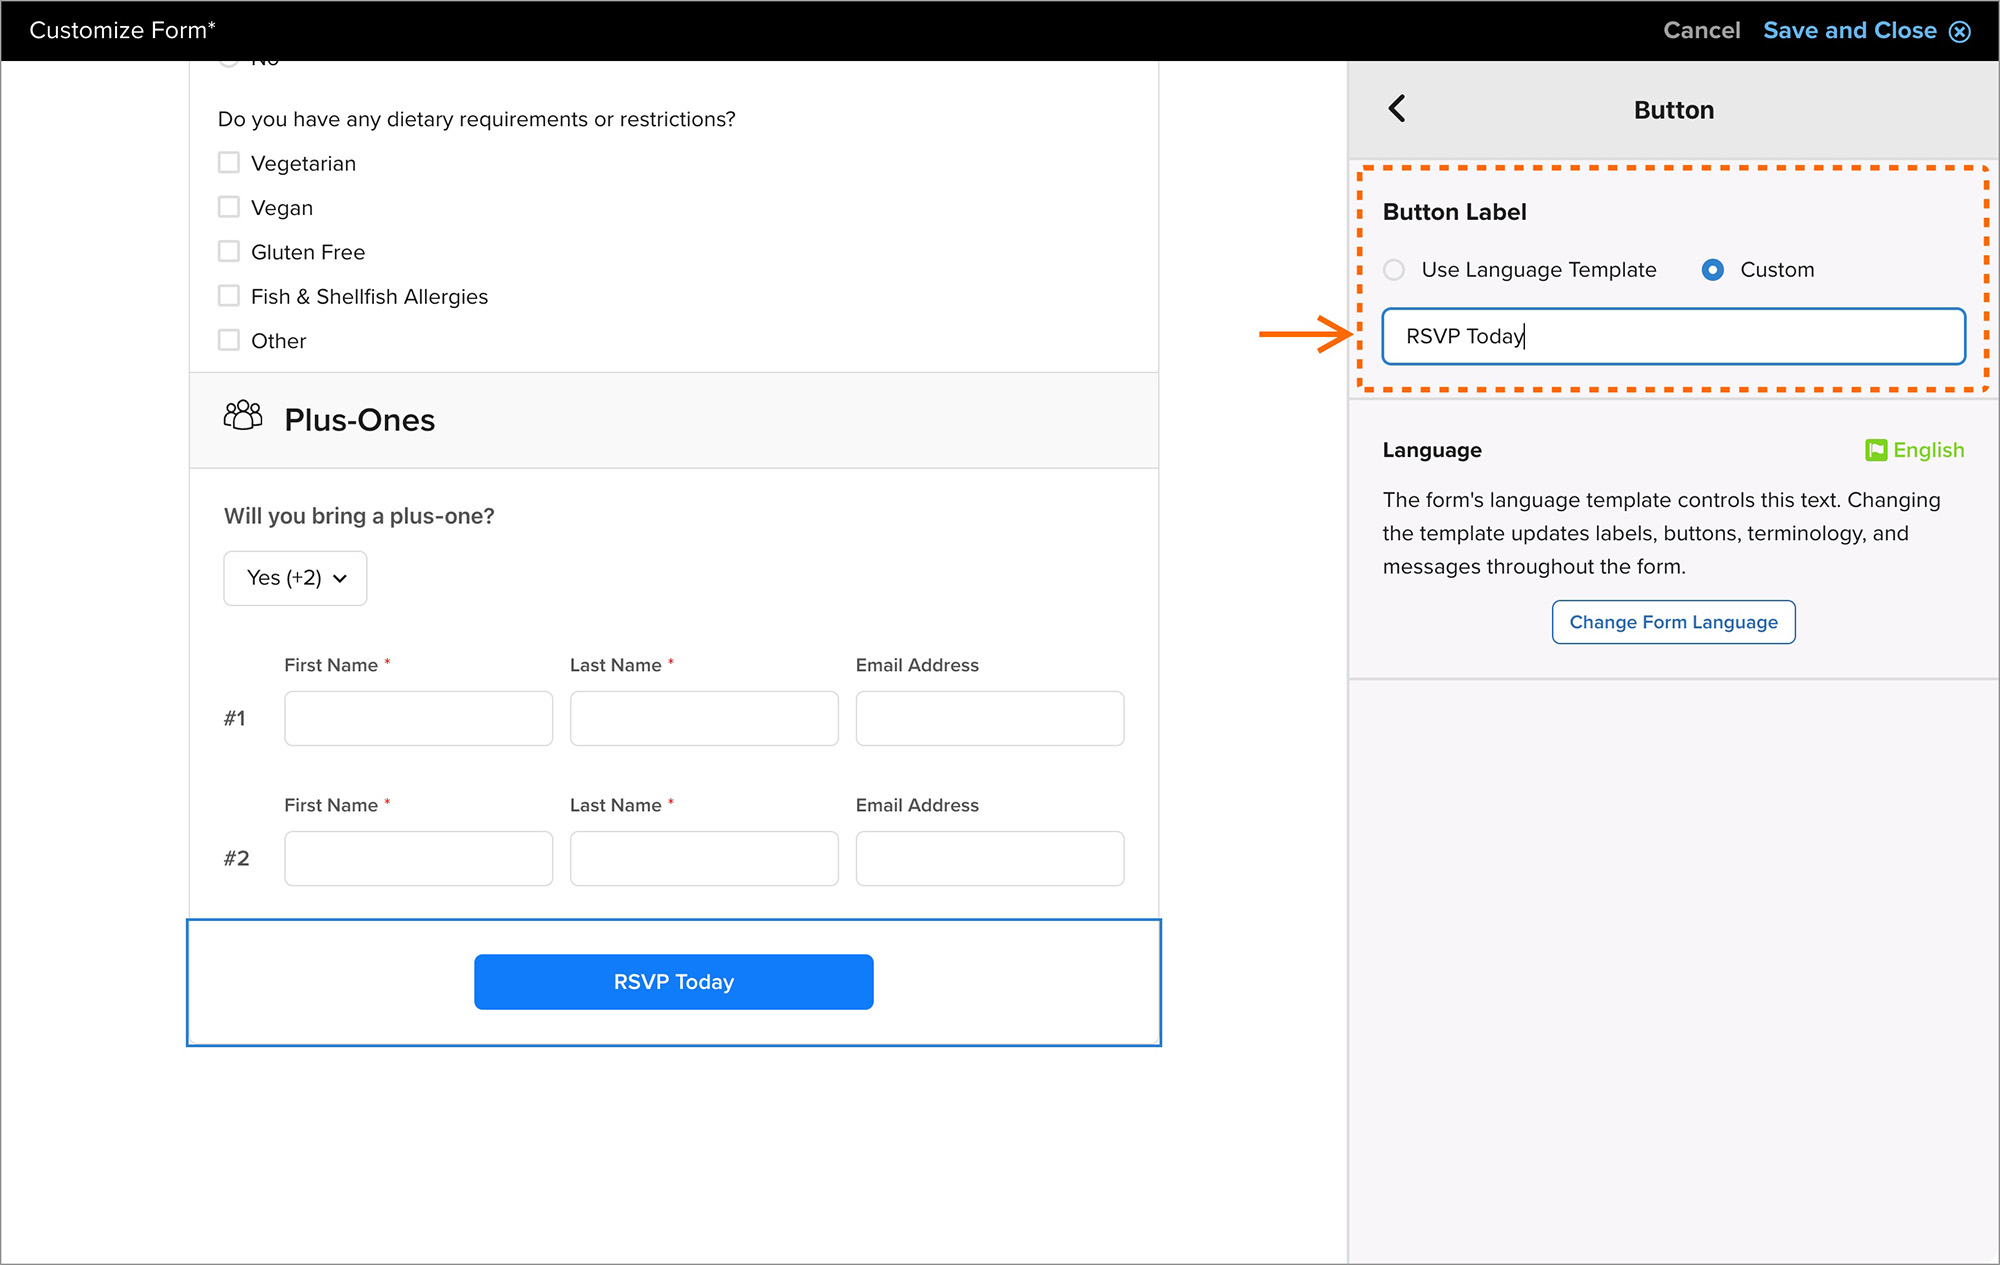
Button labels can now be customized directly in any form without creating or editing a Language Template.
New features, improvements and fixes in Diobox, as they ship.
Button labels can now be customized directly in any form without creating or editing a Language Template.
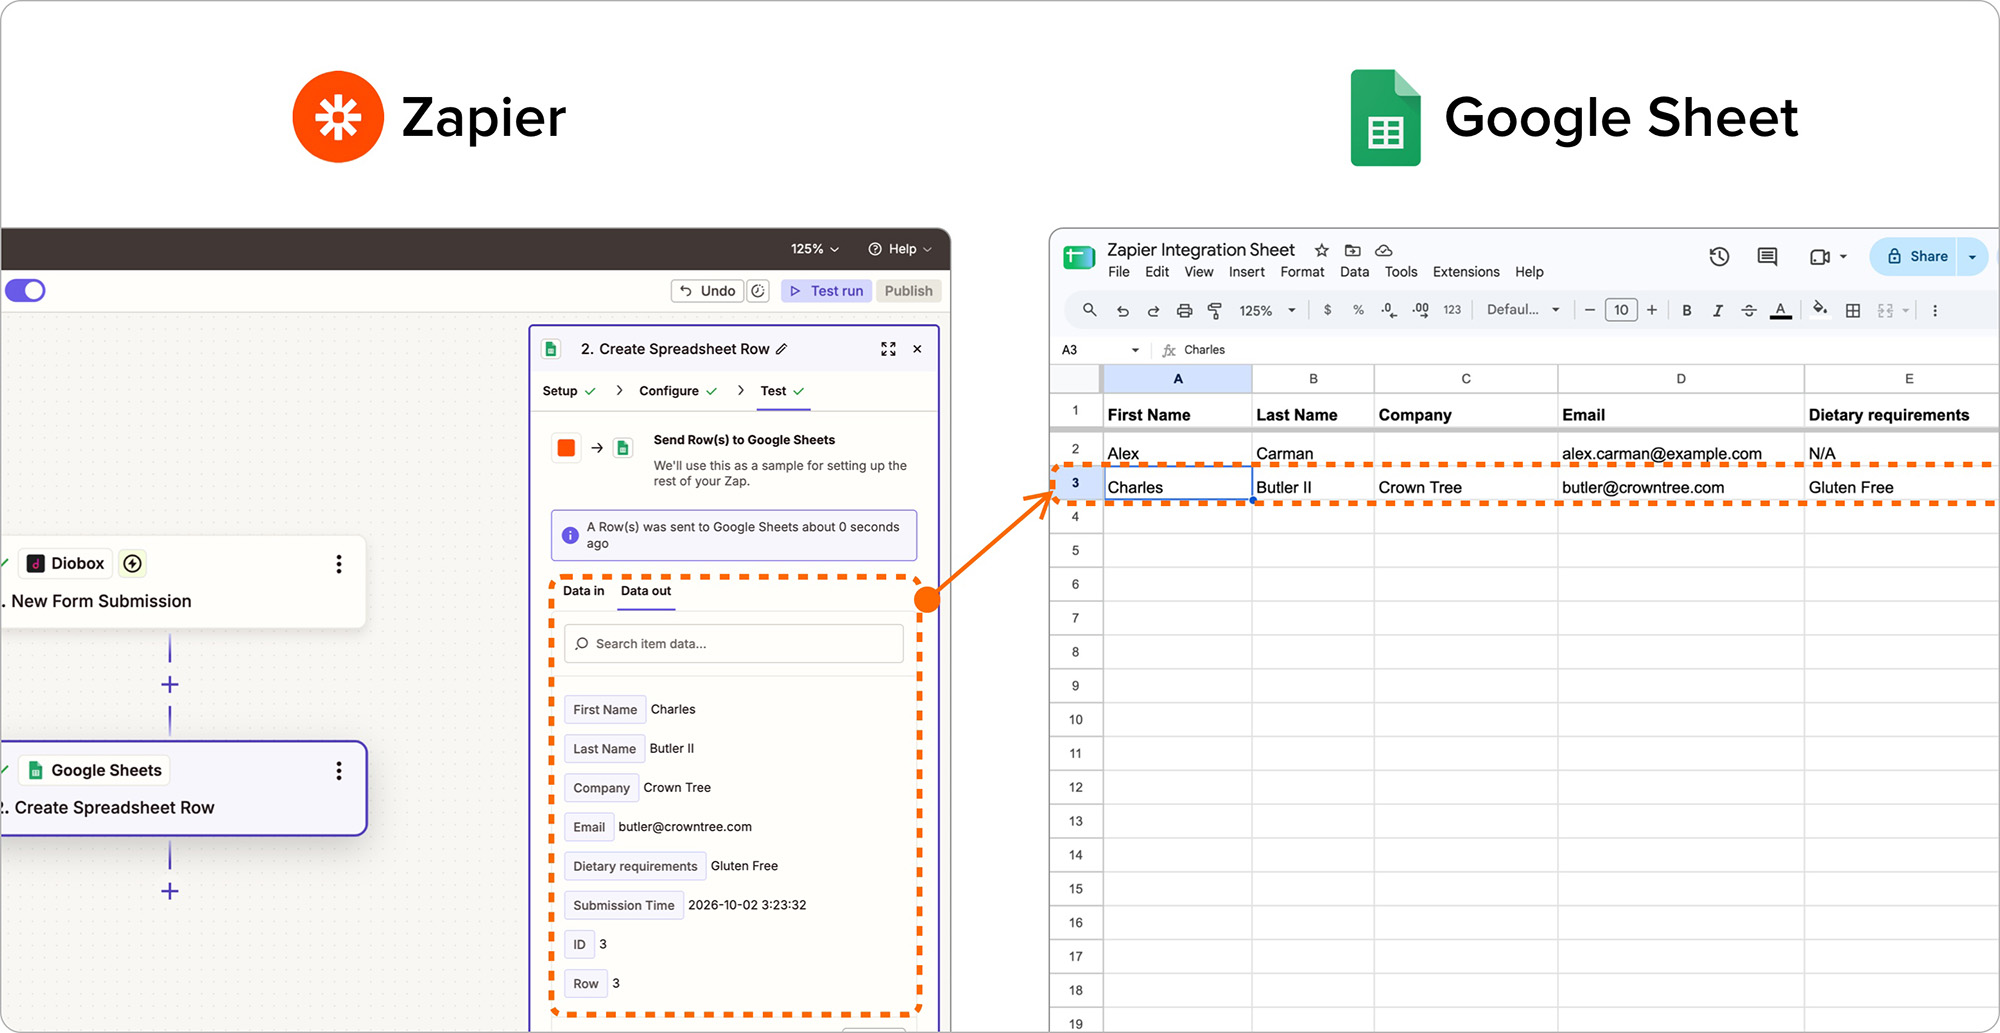
Diobox now integrates with Zapier, allowing you to connect your events to thousands of apps, including Slack, Google Sheets, HubSpot, Salesforce, and Mailchimp. Automate everyday tasks and keep your event data connected to the tools your team uses, without writing code or exporting CSVs.
New registrations, RSVP changes, and guest check-ins can trigger workflows automatically. Send a Slack notification when a VIP arrives, log form submissions in a shared Google Sheet with each answer in its own column, add new guests to Mailchimp, or update RSVP statuses in your CRM. You can also bring guests into Diobox from a spreadsheet, CRM, or form tool, with duplicates skipped automatically.
Zapier is available now on the Enterprise plan. To get started, open an event, go to Event Settings → Integrations, and create an API key.
Follow the Diobox + Zapier Integration Guide to build your first Zap.
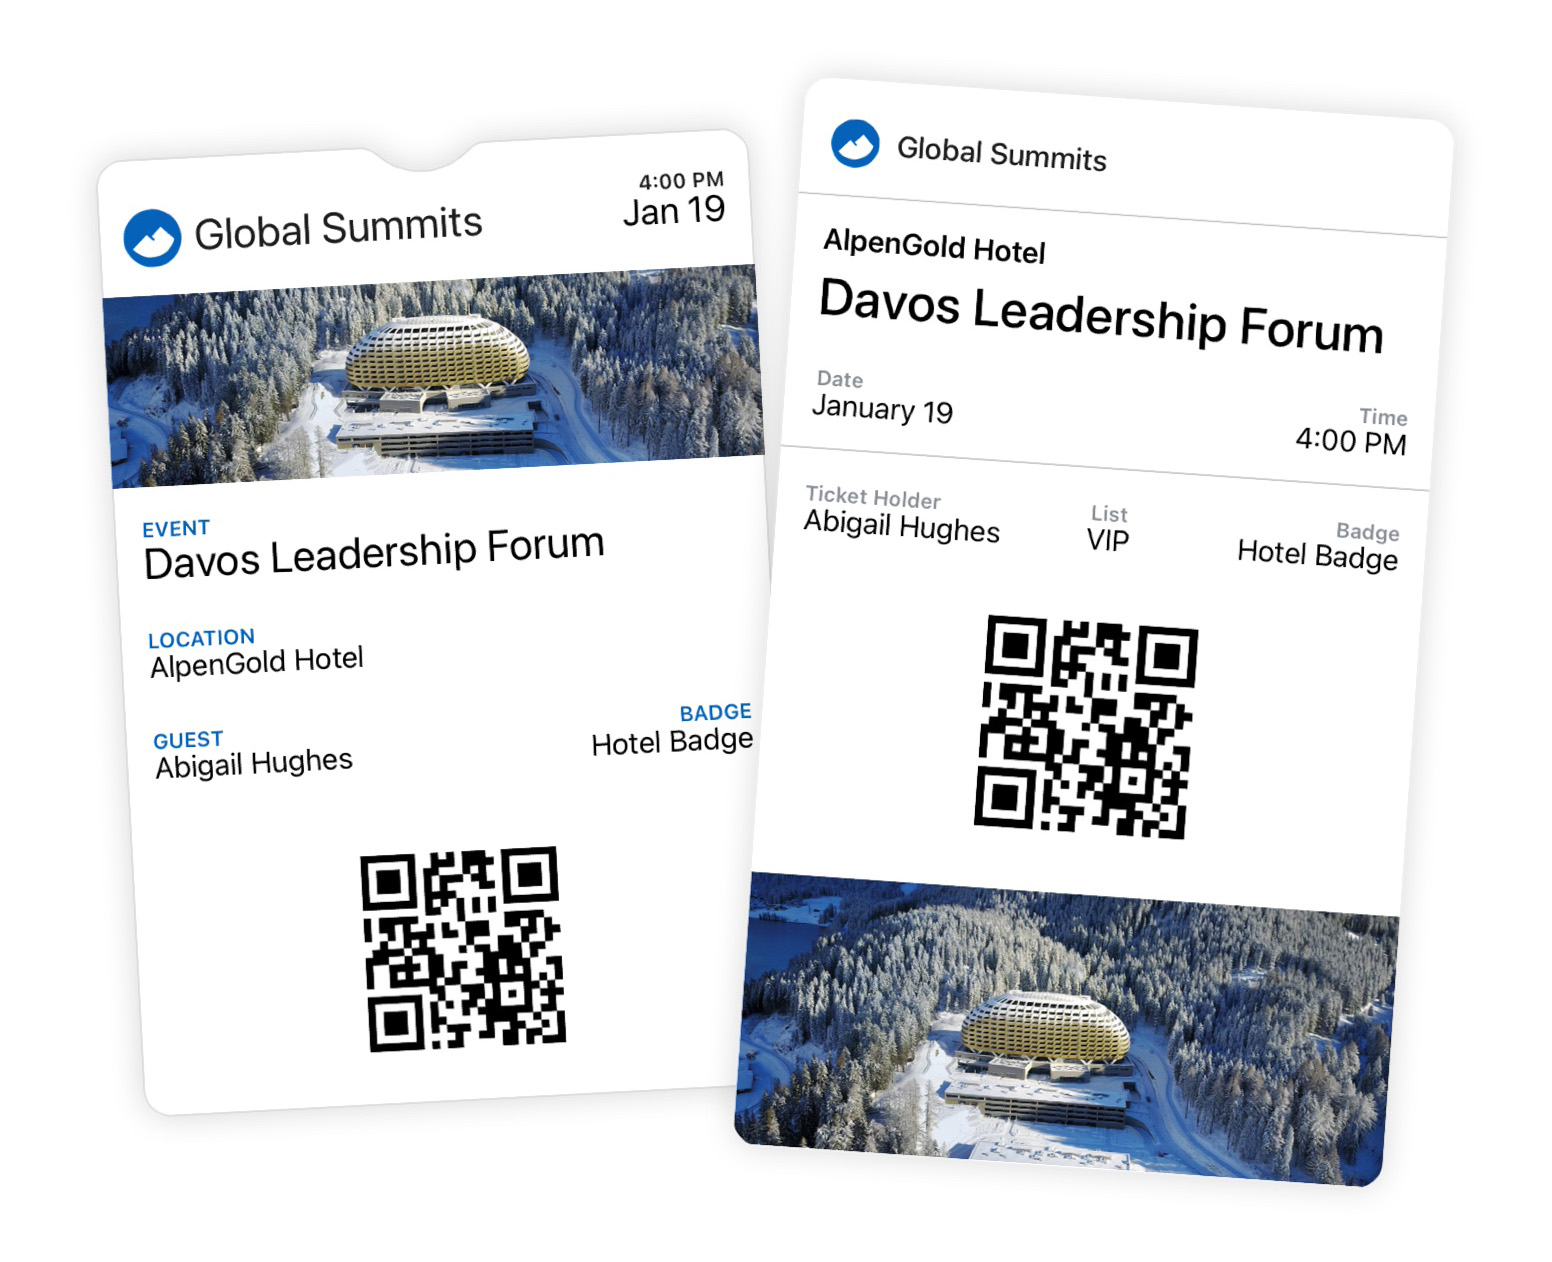
The Wallet Pass Builder has received a major update, with improvements to both the user interface and field structure. These changes provide greater compatibility between Apple Wallet and Google Wallet passes, making it easier to create and manage passes across both platforms.
The updated customization experience also includes improved error handling and a simplified structure, providing a more streamlined and reliable process for building cross-platform wallet passes.
Fixed a rare issue where duplicated email campaigns could inherit recipients from a previous send.
Guest Filtering
The Guests screen now supports guest list and segment filtering, making it easier to view only the guests you need.
Performance and Stability Improvements
Improved overall app speed and stability.
Editing a registration form now sends email confirmations according to the configured Email Responders settings.
An issue that could cause ticket forms with certain pricing and settings to display an error has been fixed.
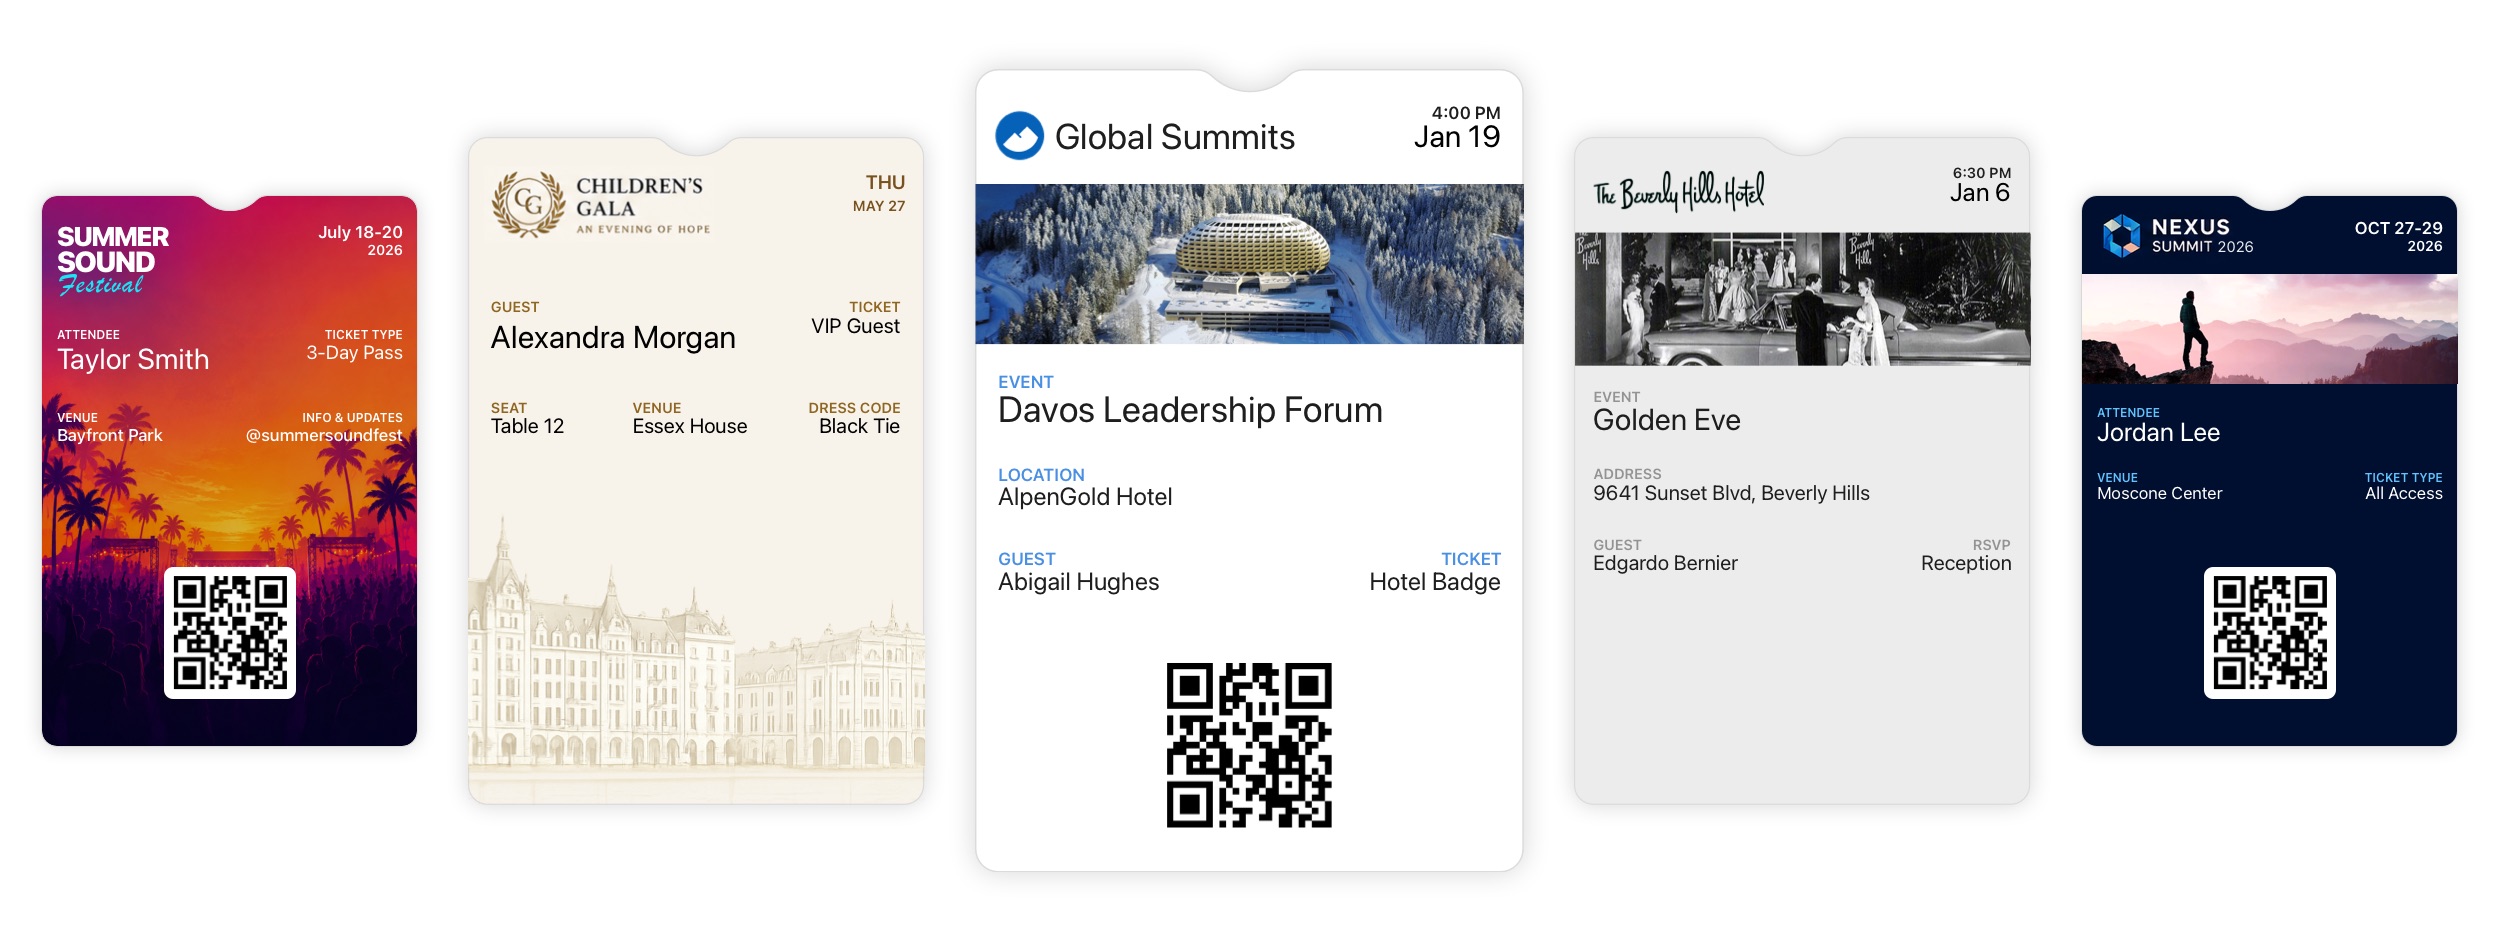
Diobox Wallet Passes now give you complete control over how your event appears in Apple Wallet and Google Wallet.
Create fully branded, dynamic passes that give guests instant access to their event details and QR codes, right from their phones.
Make every pass an extension of your event brand. Customize logos, banner images, colors, and text styles to create a polished experience that looks and feels like your event, not a generic ticket.
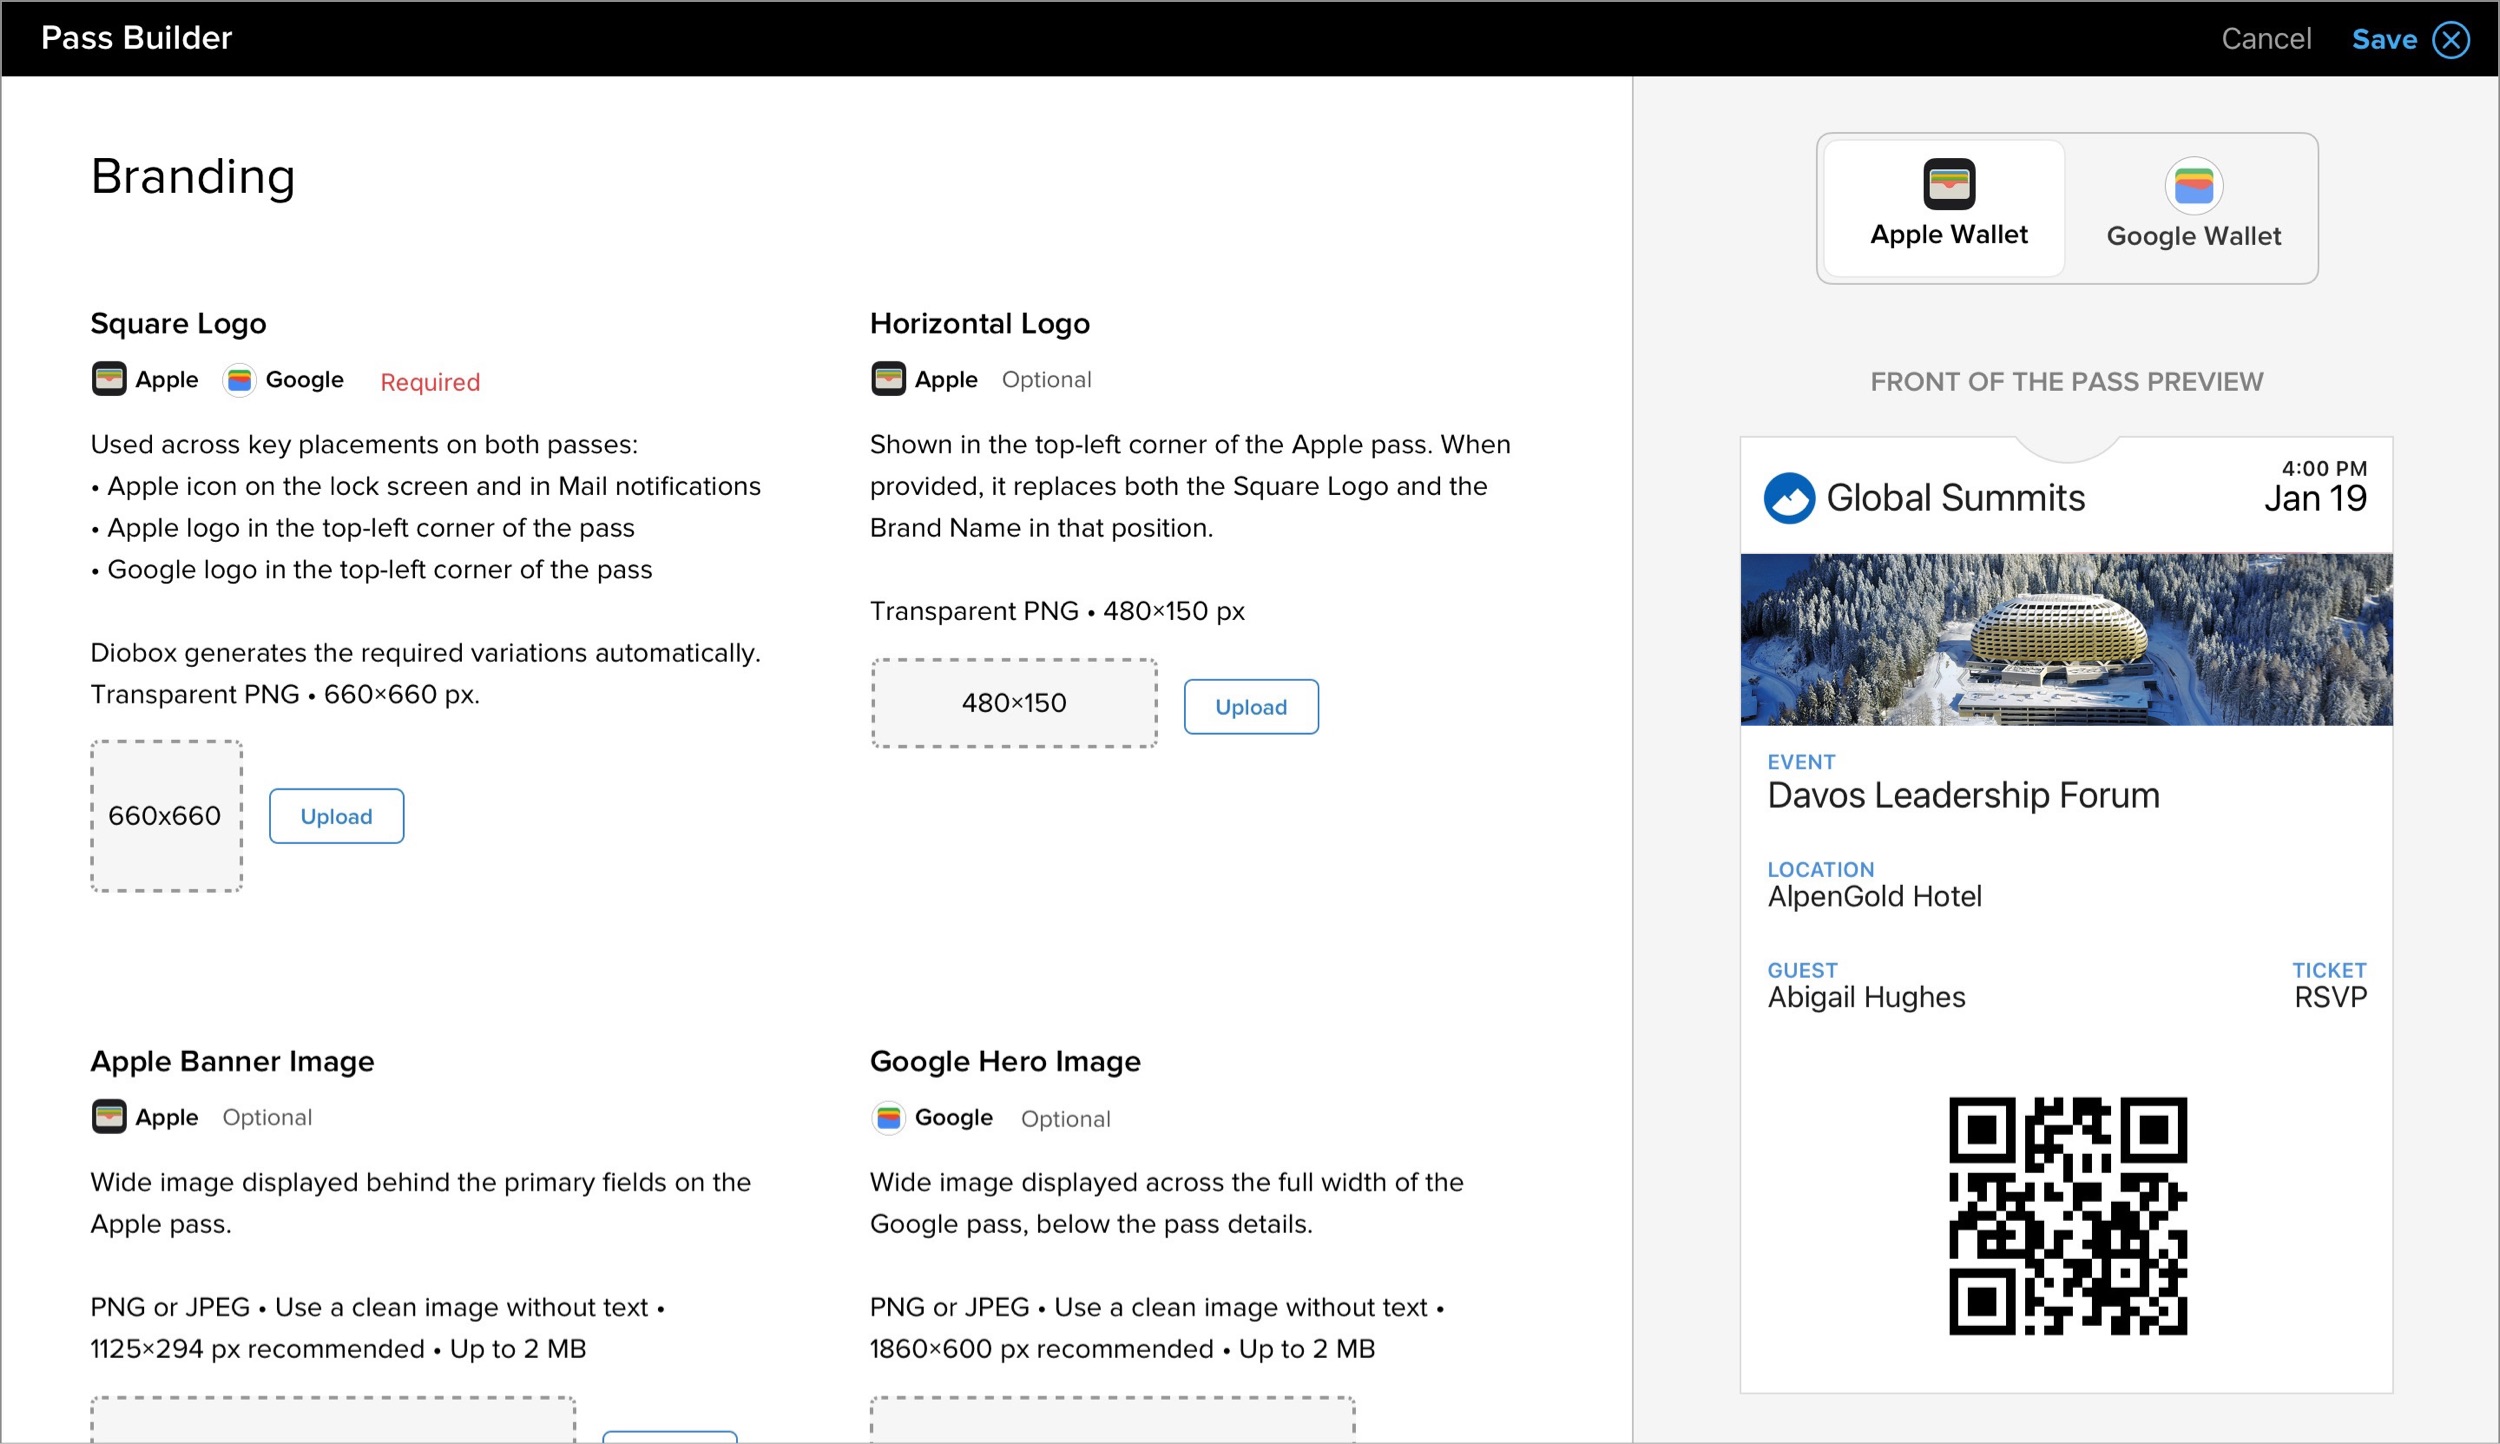
Add any guest or event field directly to your pass template. Guest names, ticket types, seats, dates, locations, and other details automatically populate for each guest.
You can also include each guest’s unique QR code for fast scanning and check-in at the event.
Design your pass once using Diobox’s unified Wallet Pass Builder. Diobox automatically generates the appropriate Apple Wallet and Google Wallet versions behind the scenes, with no need to create or maintain separate templates.
Use the Back of the Pass for additional event information guests may need. Add longer text sections along with tappable links for websites, email addresses, phone numbers, and locations.
Wallet Passes stay on the guest’s phone and can surface on the lock screen as the event approaches. Guests have their event details and QR code readily available without searching through emails at the door.
With digital wallets now used by billions of people worldwide, Wallet Passes provide a familiar, convenient way to keep event information accessible throughout the guest journey.
To create and customize Wallet Passes, go to Event Settings → Wallet Passes.
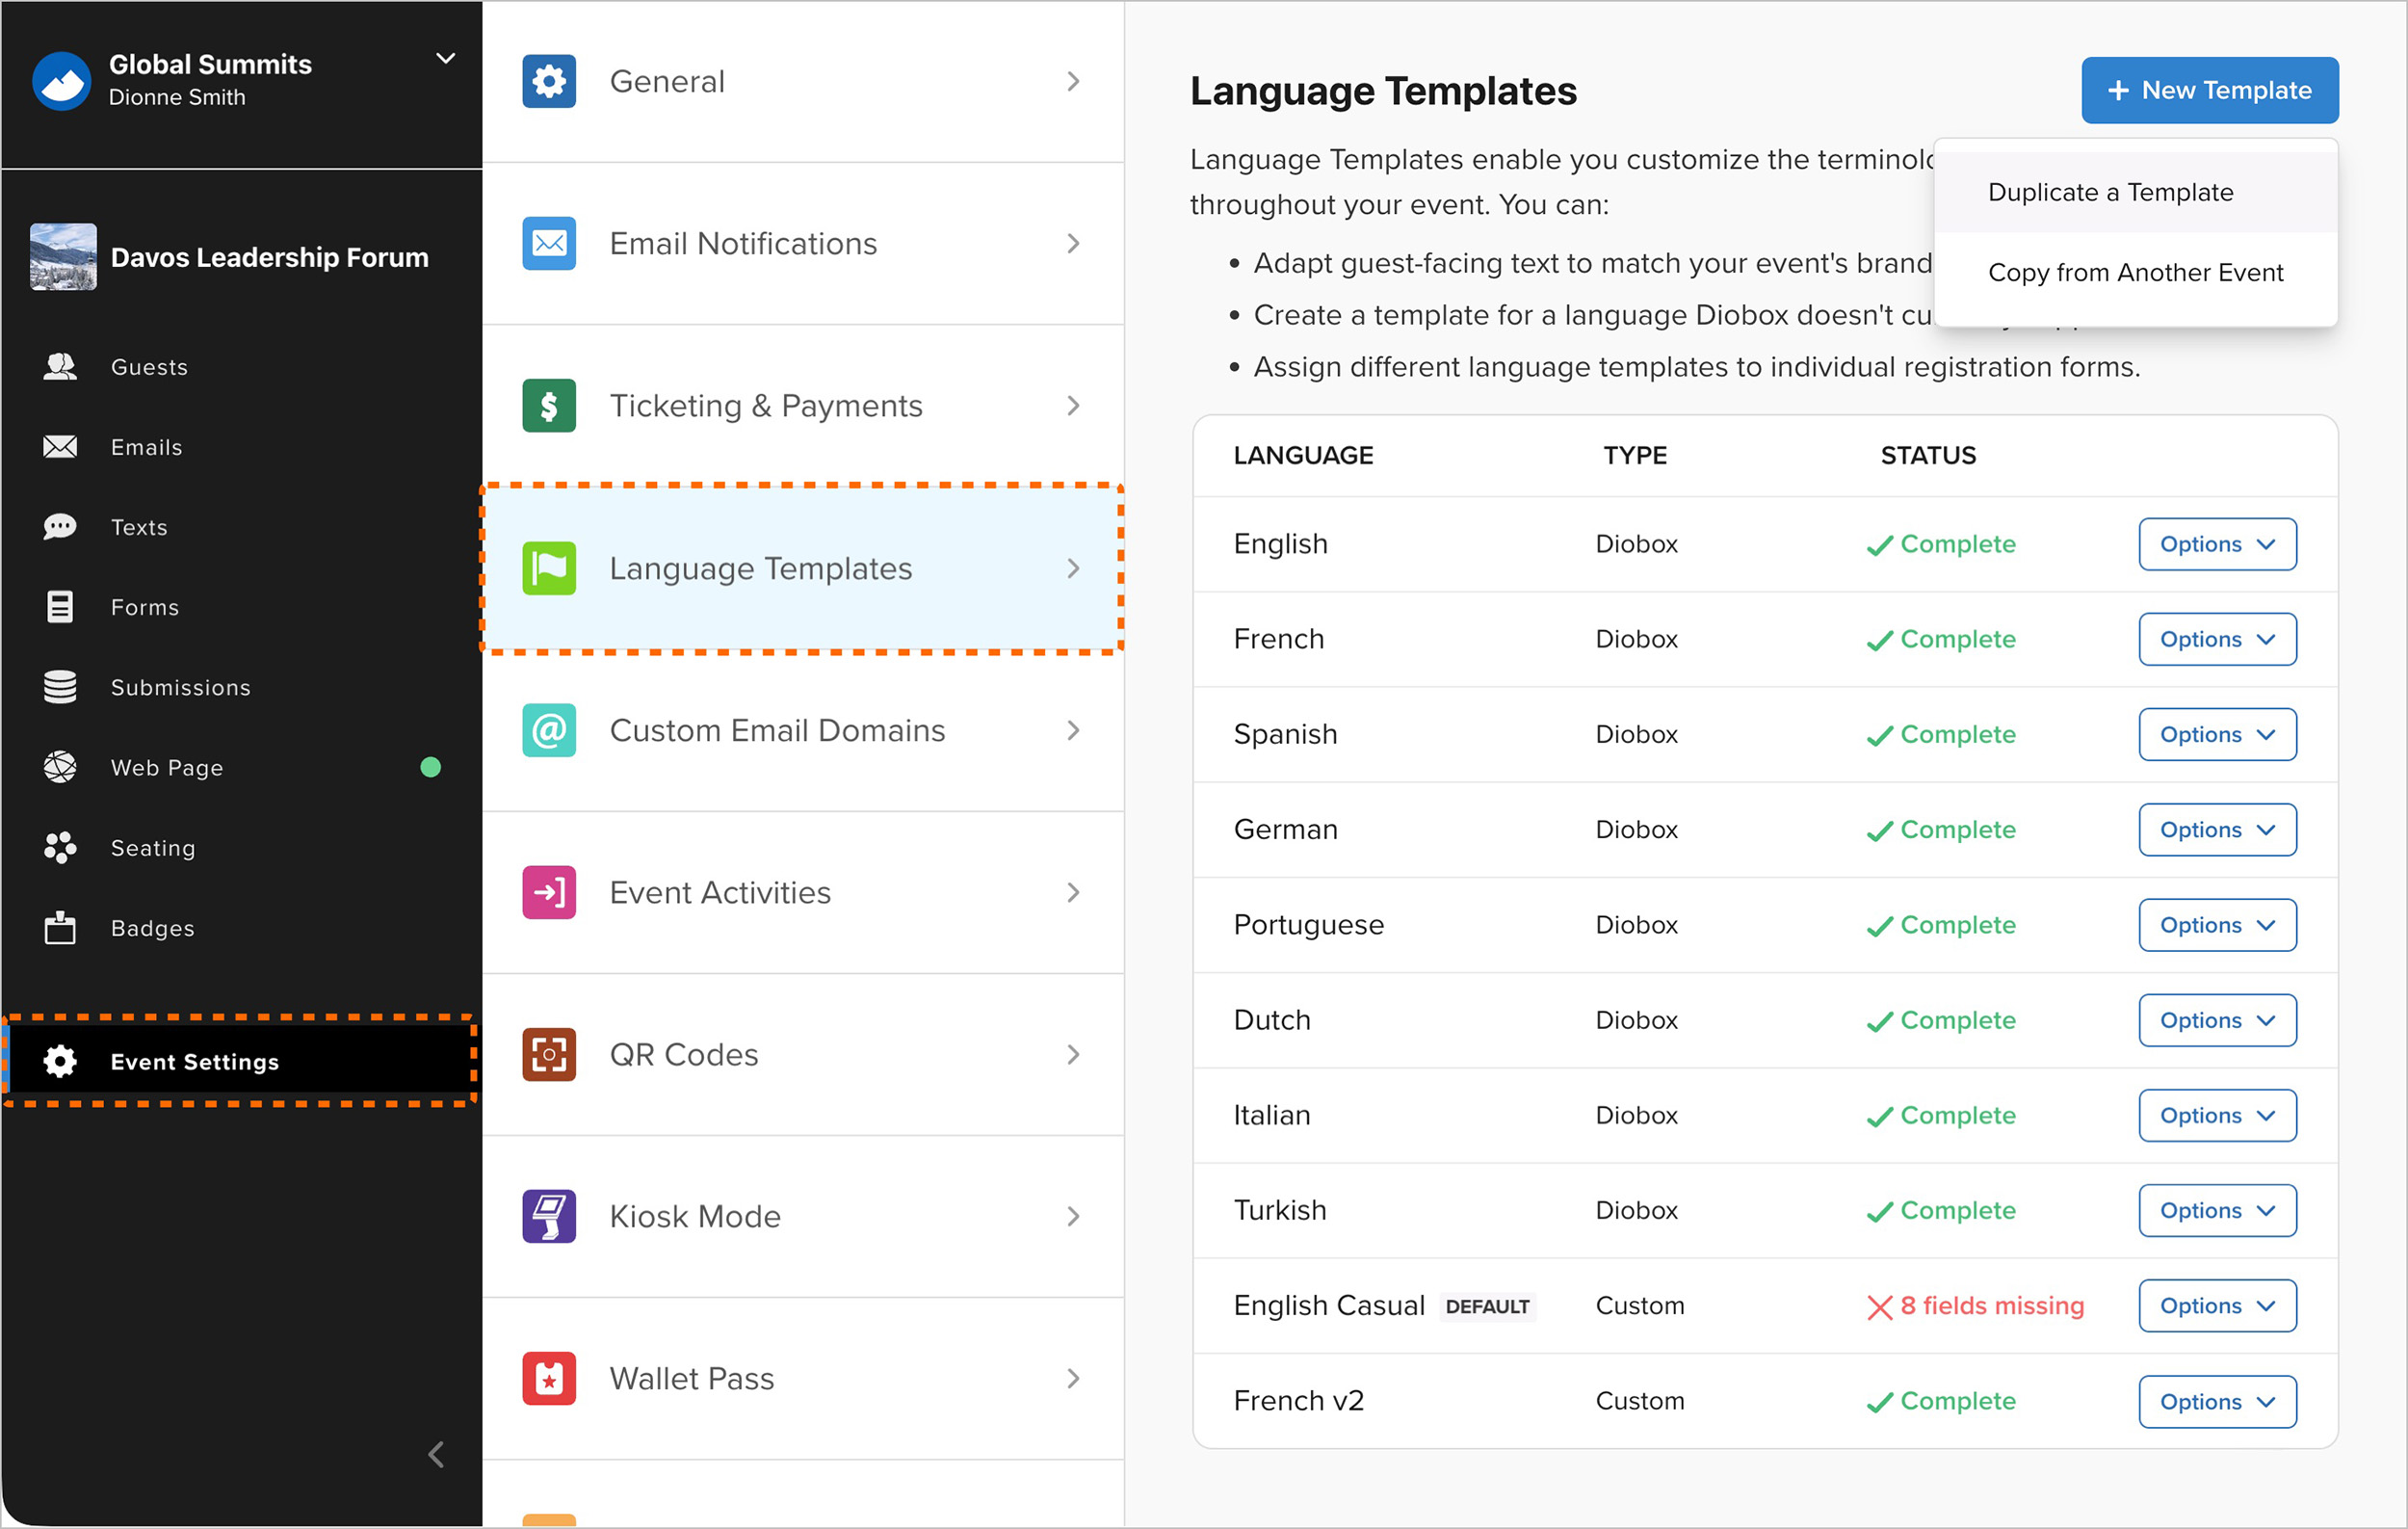
Language Templates are now available in Diobox, giving you full control over the terminology and messages guests see throughout your event.
Whether you’re hosting an international audience, running registration in multiple languages, or simply want guest-facing language to better reflect your brand, Language Templates make it easy to tailor the experience.
Choose from many built-in languages, including English, French, German, Spanish, and Italian, with translated terminology and messages ready to use. Need a language that Diobox doesn’t currently support? Create your own Language Template and customize it for your event.
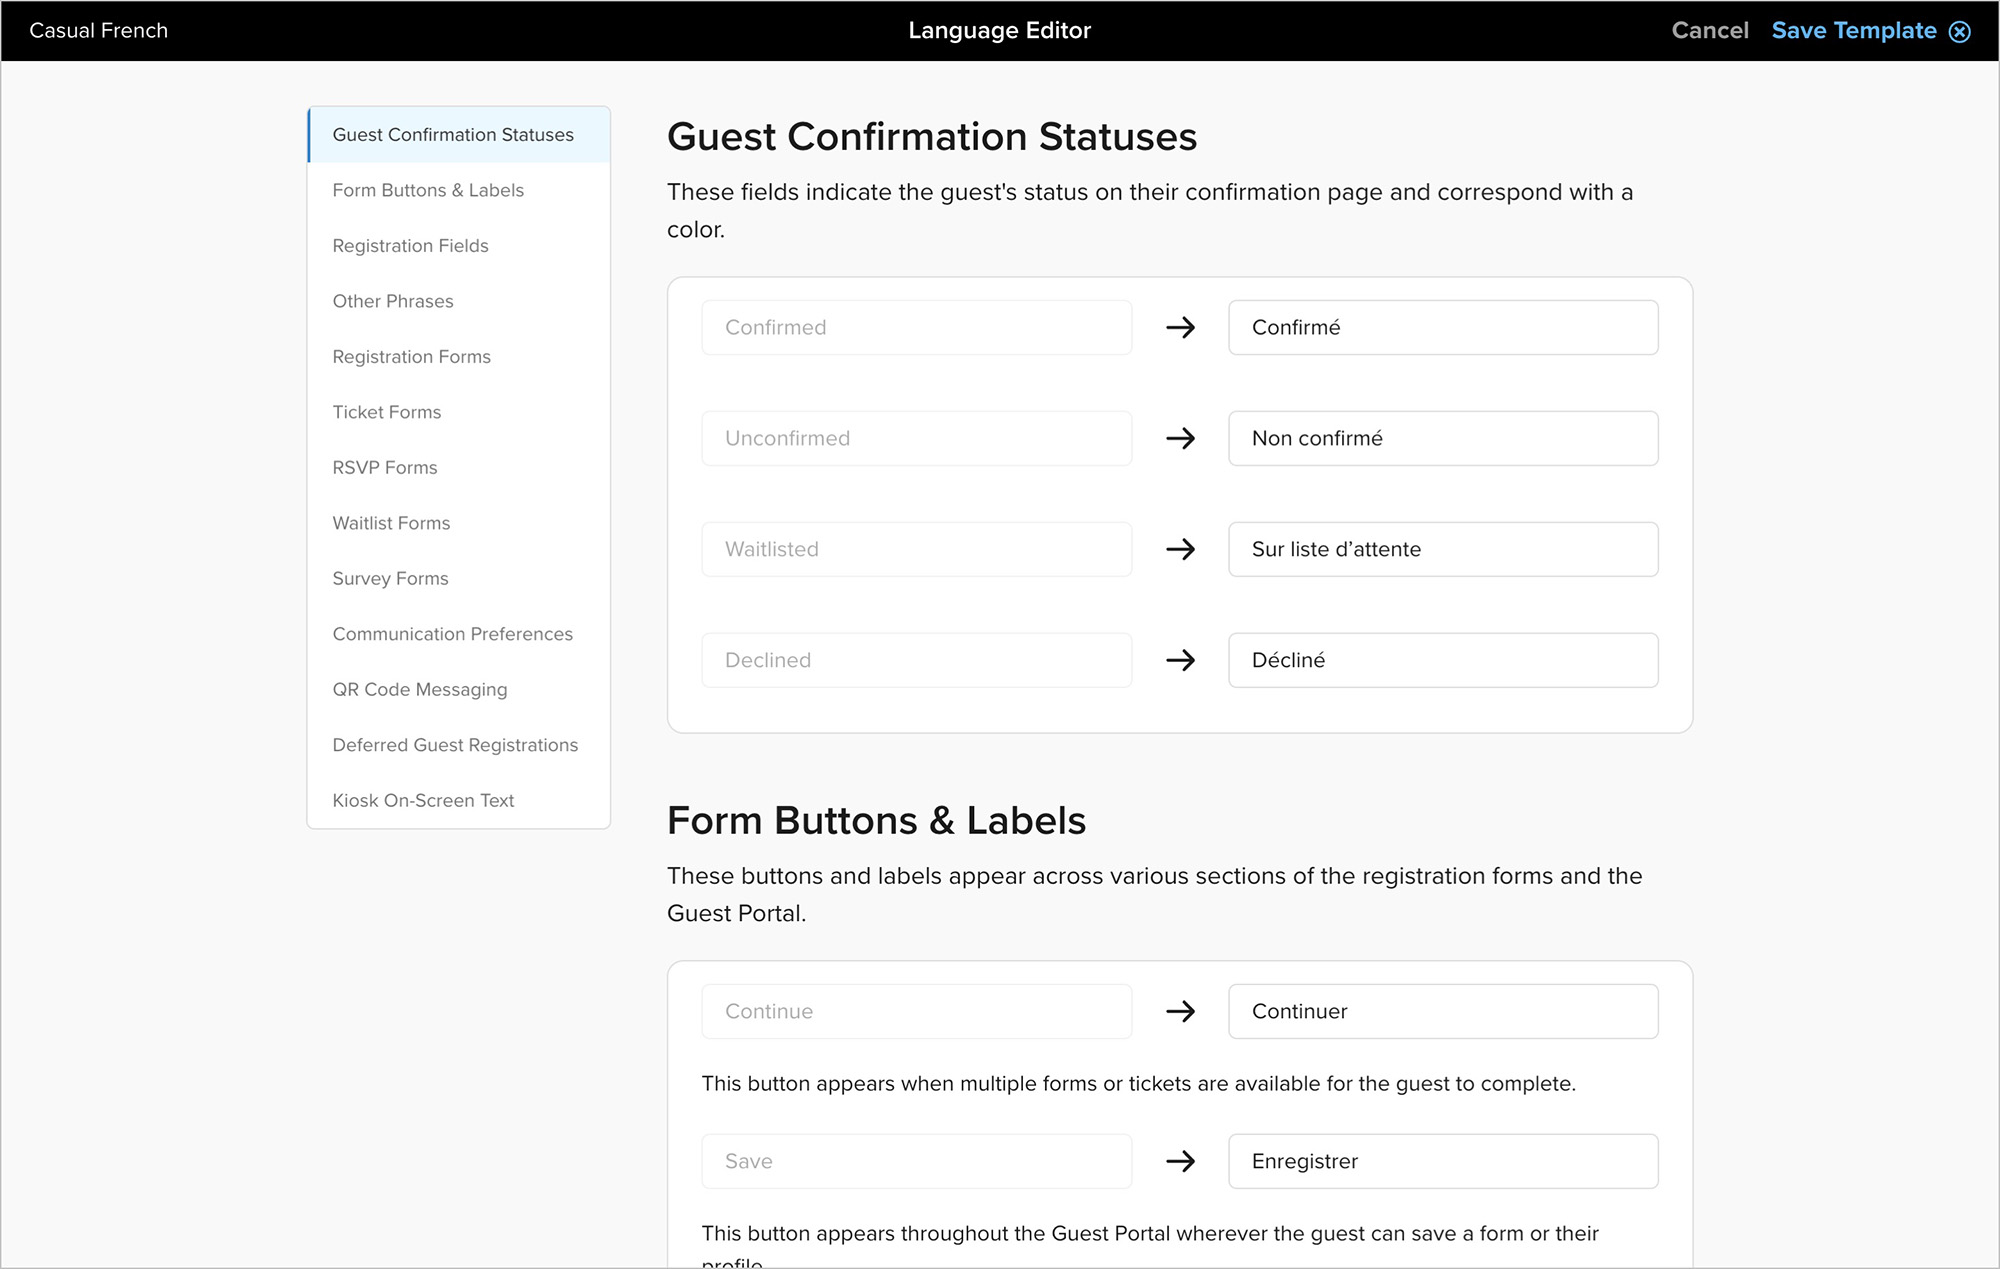
Language Templates aren’t just for translation. Customize terminology, labels, and messages to match your organization’s voice, branding, or the specific language used for your event.
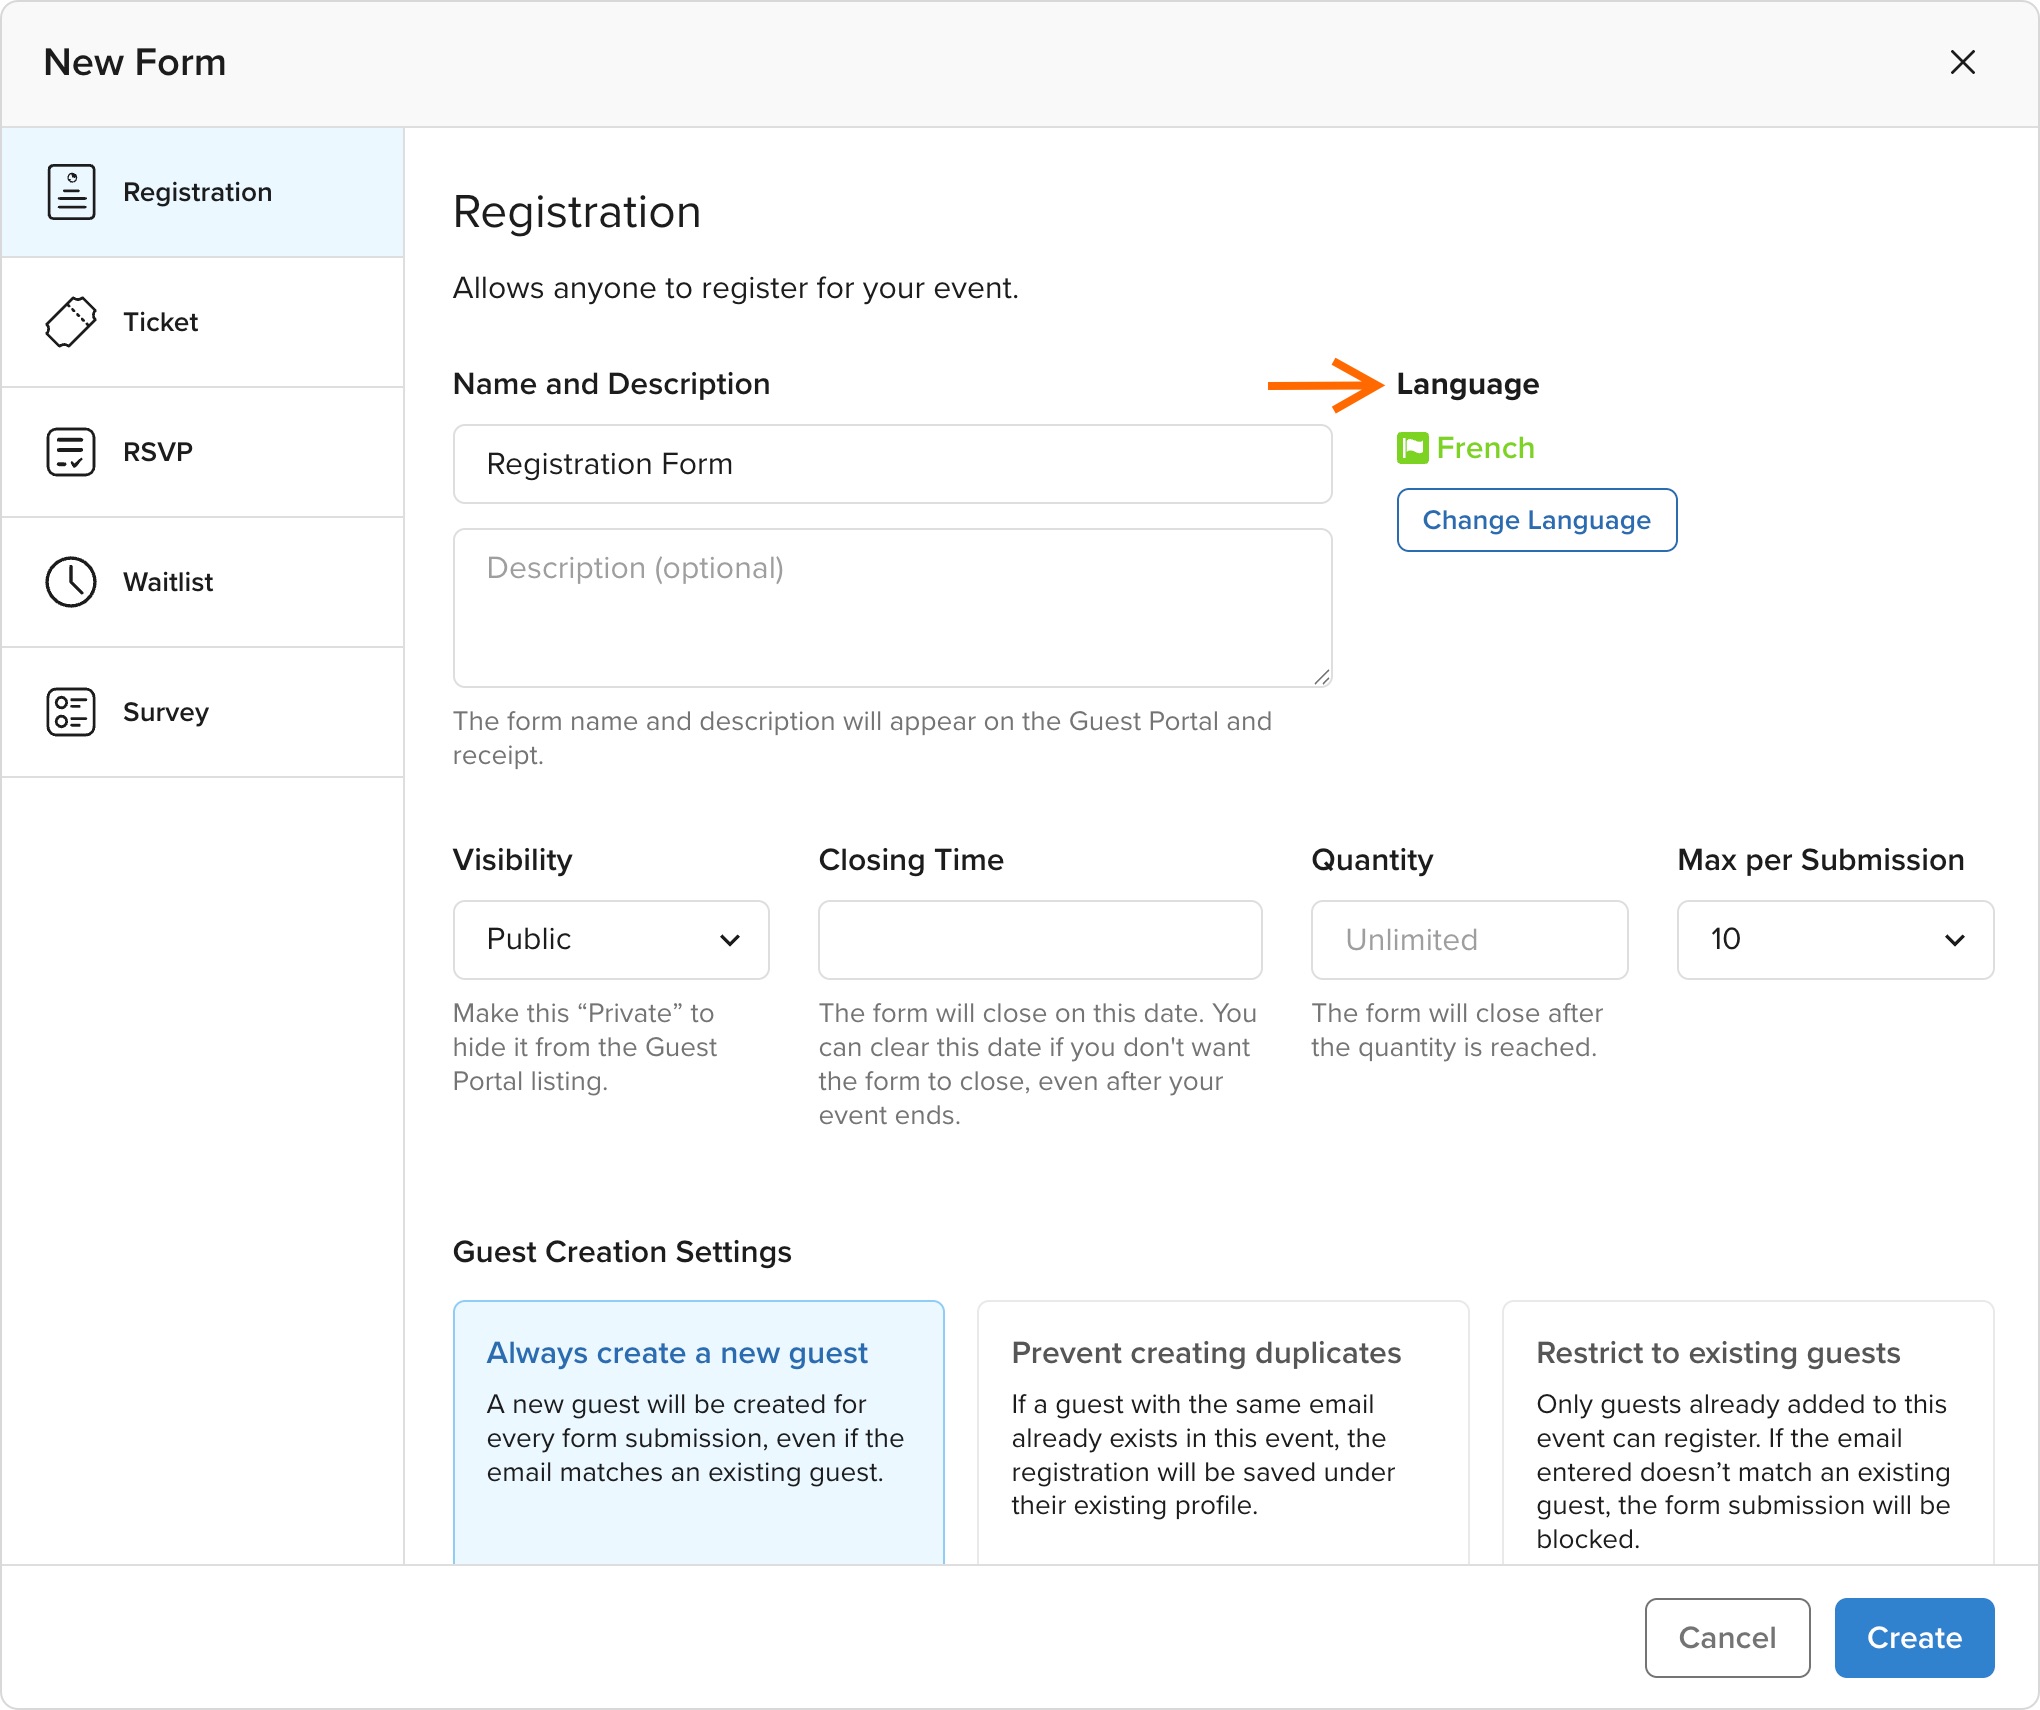
The Form Builder now includes its own language setting, allowing you to assign a different Language Template to each registration form. This means a single event can have separate forms for different languages, with each guest seeing the appropriate terminology and messages throughout their registration experience.
Once you’ve created or customized a Language Template, you can copy it to other events. This makes it easy to maintain consistent translations and terminology across your event program without recreating them each time.
Get started in Event Settings → Language Templates.
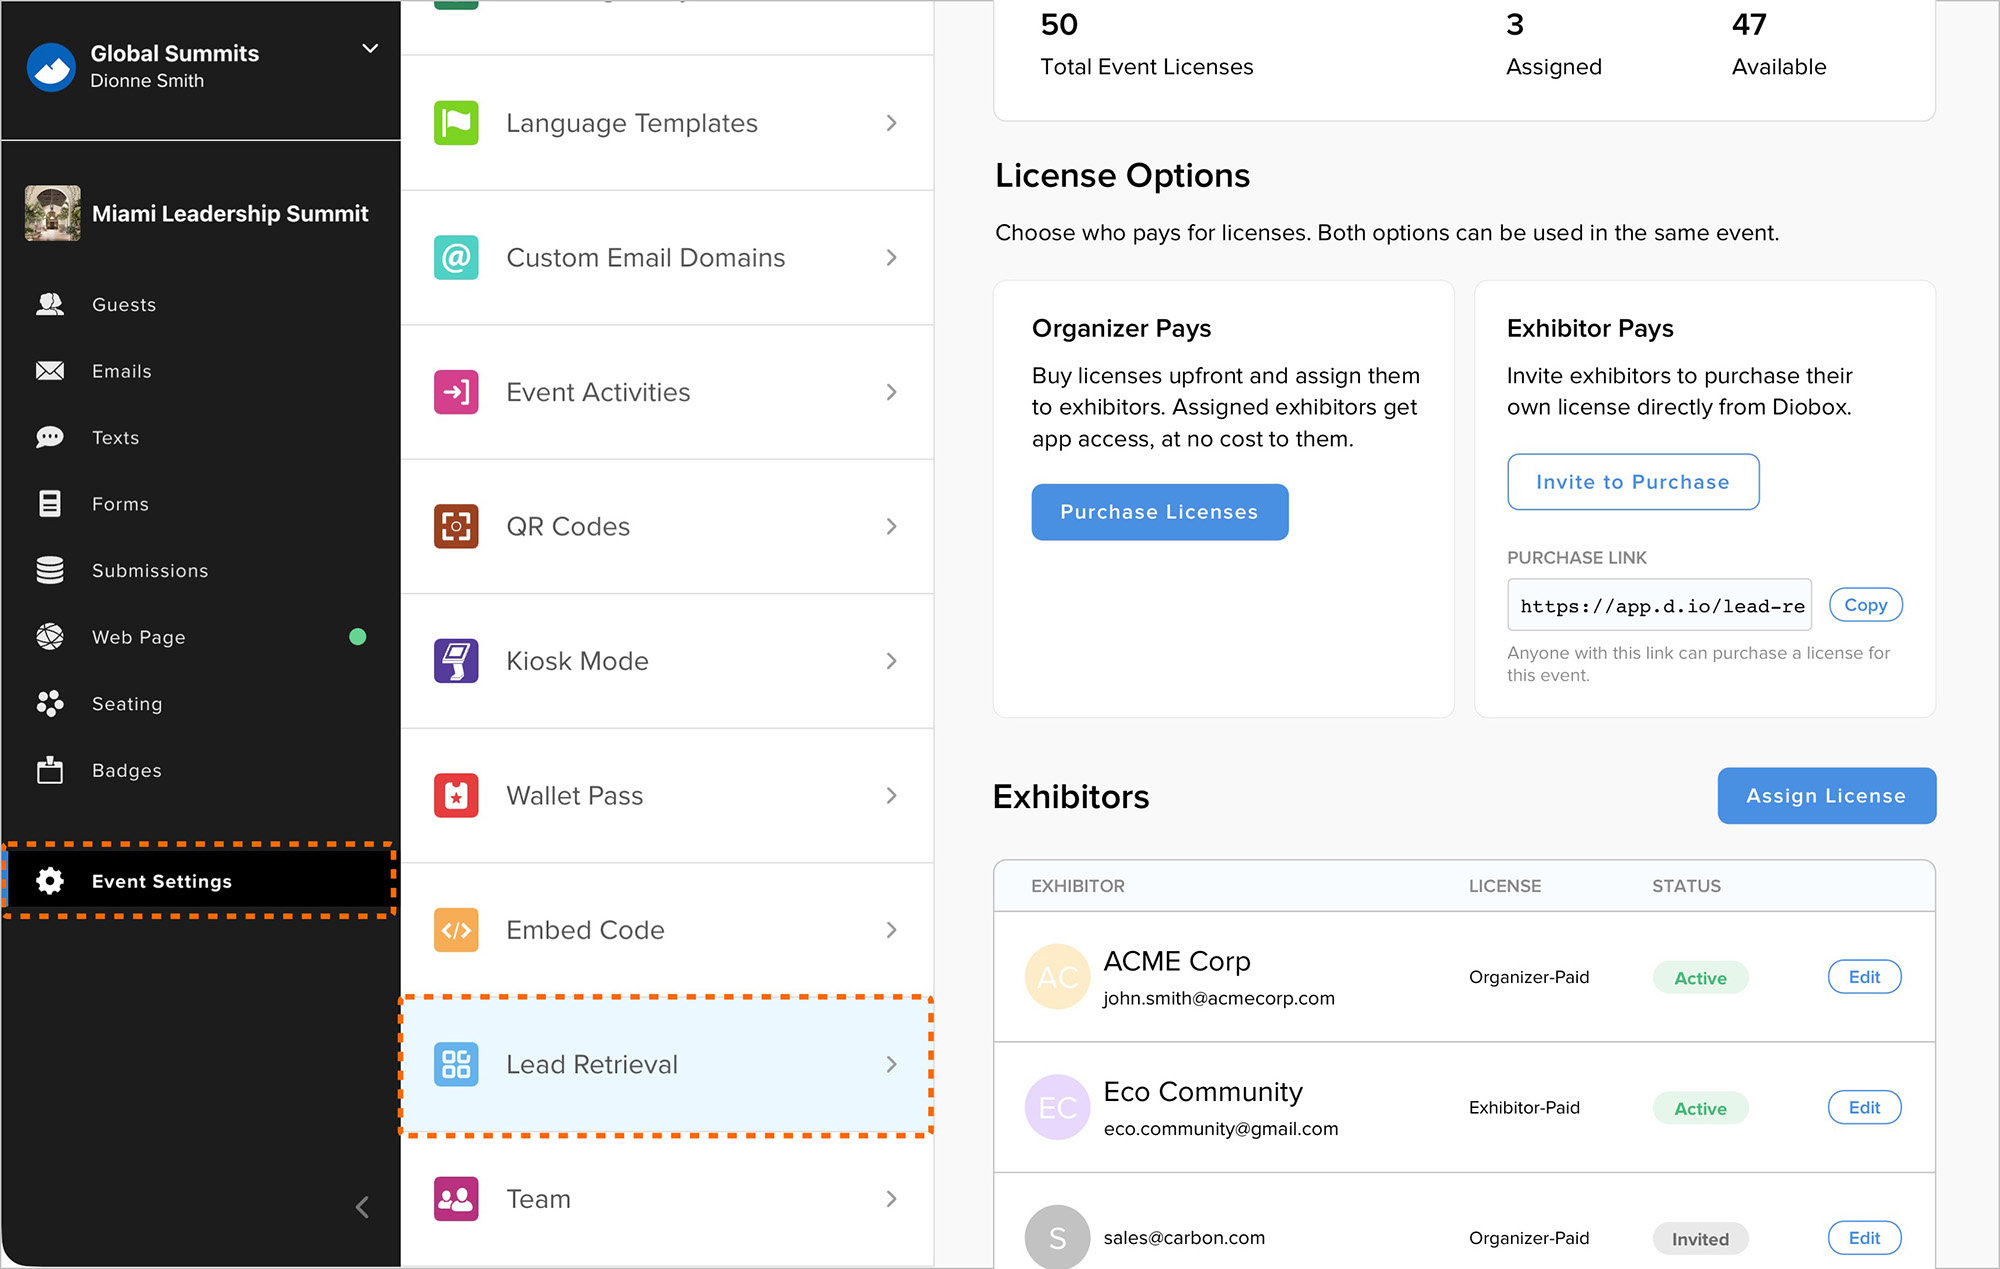
Major new improvements to Lead Retrieval give event organizers more control over licenses, exhibitors, and collected leads.
Flexible License Purchasing: Organizers can purchase Lead Retrieval licenses directly within an event or have exhibitors purchase their own.
License Assignment: Available licenses can be assigned to new users, with invitations to create a Diobox account.
License Types: Organizer-Paid and Exhibitor-Paid licenses are now clearly identified for each exhibitor.
Lead Tracking: Organizers can view the total number of leads collected by each exhibitor, broken down by lead type.
Lead Distribution: Collected leads can be exported directly or sent to individual exhibitors.
Improved Experience: Numerous UI and UX improvements make Lead Retrieval easier to set up and manage.
These updates are available in Event Settings → Lead Retrieval.
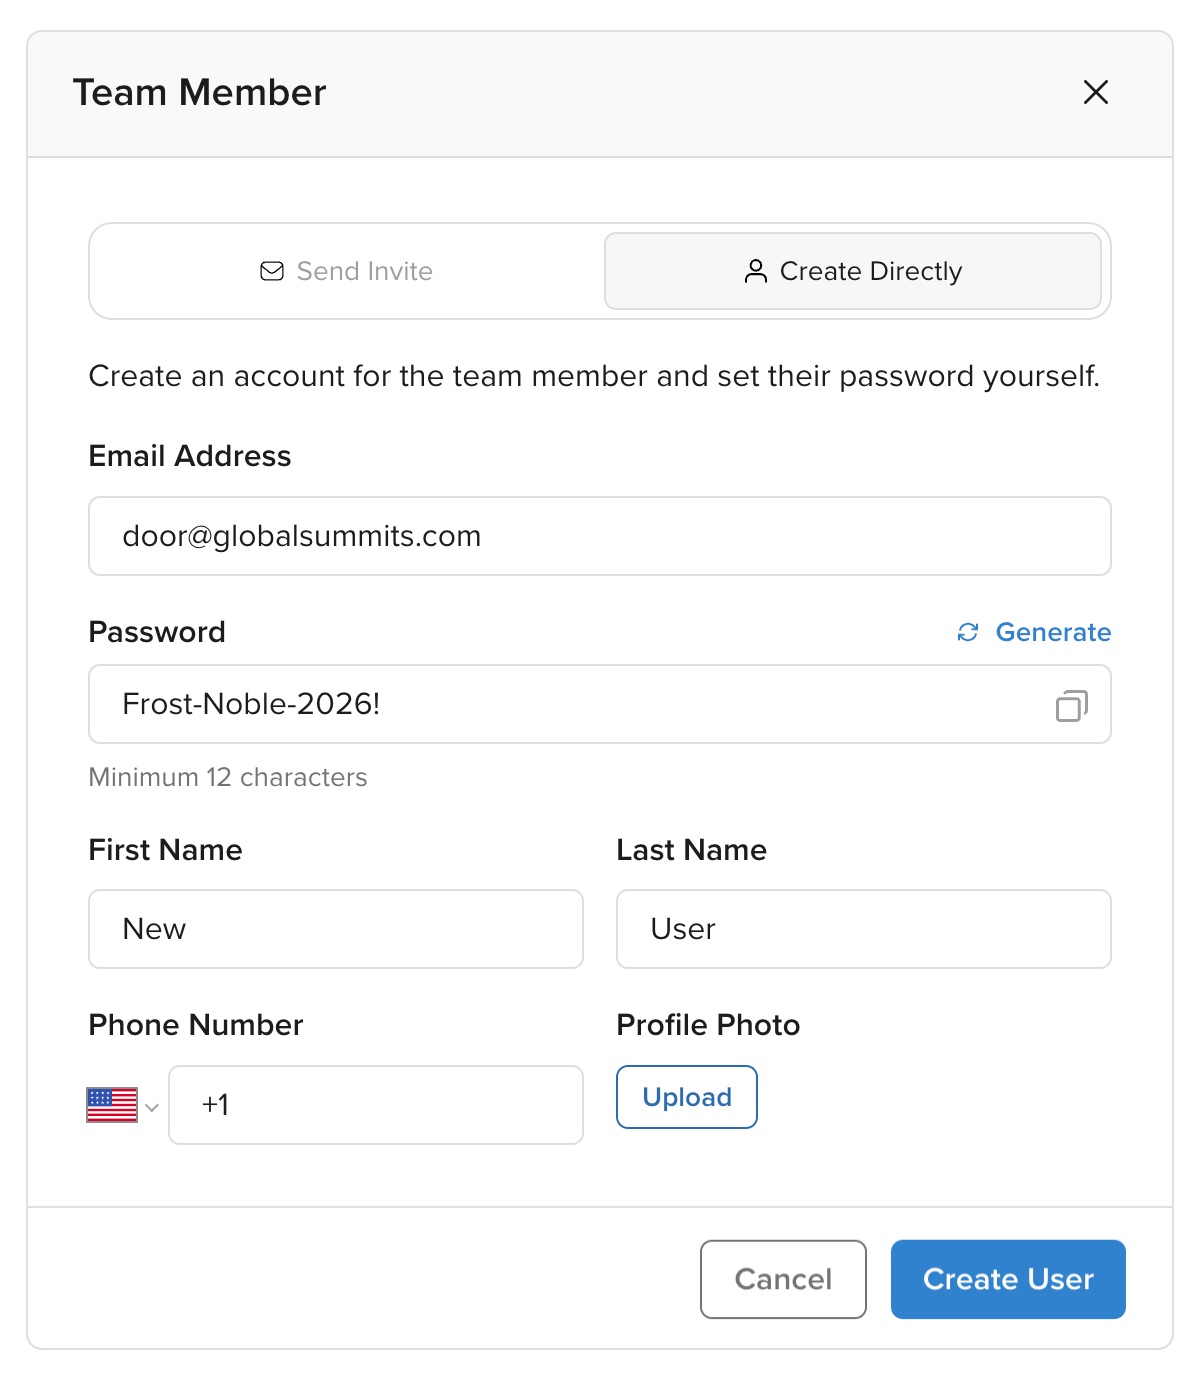
Admins can now create team member accounts directly, assign licenses, and set passwords from Event Team Settings. Invitations can still be sent when team members should create their own accounts. This makes it easier to set up accounts for event staff using shared event devices.